RTInstantML-production-pipeline
Many real life forecasting problems require to set up a reliable automated pipeline. In this solution template we will show how easy it is with TIM and our Python Client. This template will demonstrate a scenario where each day at midnight a forecast of the target variable Y and its prediction intervals with 90% confidence level should be issued for the next 24 samples. There will be two predictors X1 and X2 at our disposal - both their historical actual values and their day-ahead forecast as well. We will show 3 consecutive days of forecasts, different problems that might occur along the way and how TIM can help you deal with them. This framework can be easily changed to suit other scenarios like forecasting more often or further into the future and is not restricted to the Python Client usage. It also shows powers of RTInstantML that should bring you the best accuracy possible.
To follow the subsections below you can download the data and the python notebook.
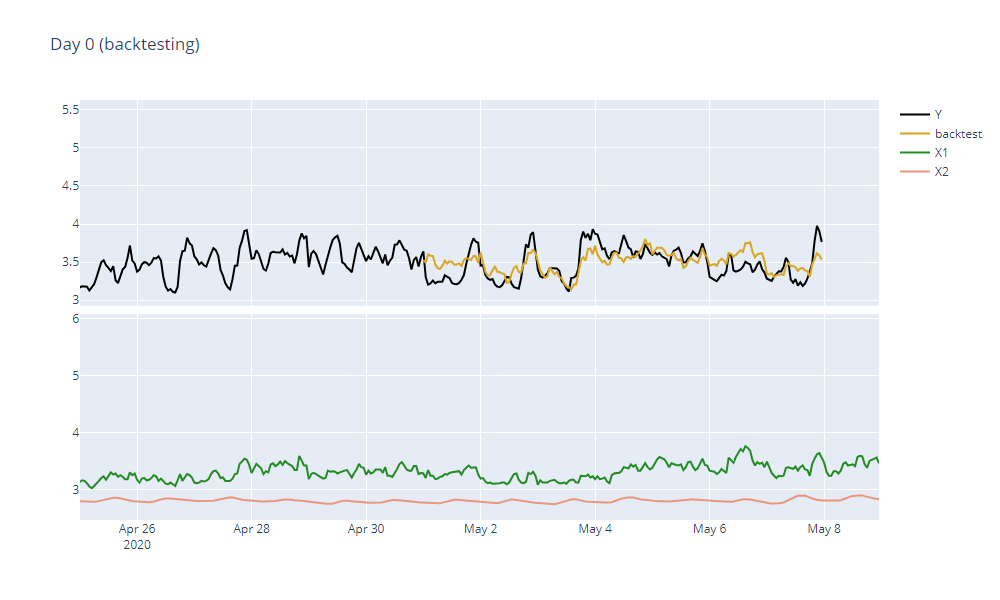
Day 0 - backtesting
Before any production pipeline starts to run, we should always make sure that our forecasts make sense and that there is nothing wrong with the dataset (or the data gathering process behind it). The best way to do that is to try and simulate the forecasting scenario using the historical data that is already available. RTInstantML's backtesting functionality allows to quickly set this up. The only thing we need to do is
- make sure that our dataset has the same shape as it would in the moment of forecasting
- set up the backtestLength parameter to specify how many of the most recent samples should be used for backtesting
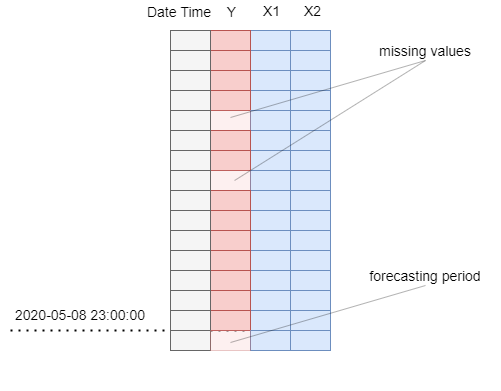
In the real production, we expect the end of our dataset to look like it does in the picture - actual values of target and predictors updated up until midnight and forecasts of predictors available for the whole next day.

We will use the last 7 days for the backtesting - we will set the backtestLength parameter to 168 (7*24 = 168 samples). This will make sure that the model will not learn anything from these days set aside and therefore will demonstrate the accuracy we should expect when we run the pipeline. When forecasting in real production, we should omit this parameter to make sure that our model uses all data available.
After TIM is done forecasting we can see that our forecast looks reasonable and has a good accuracy.
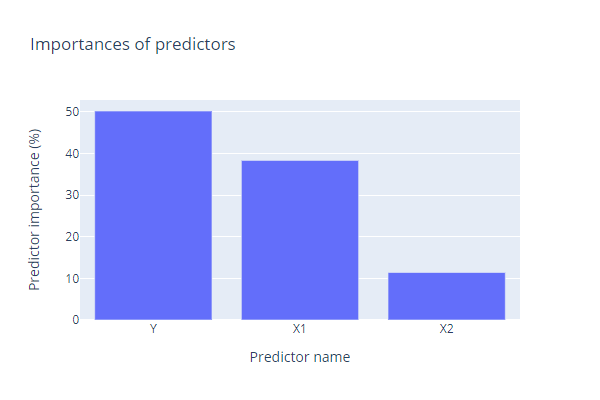
We can also observe the model structure and predictors' importance. We see that the predictor X1 will play a bigger role than the predictor X2. Everything should be ready for the next day.
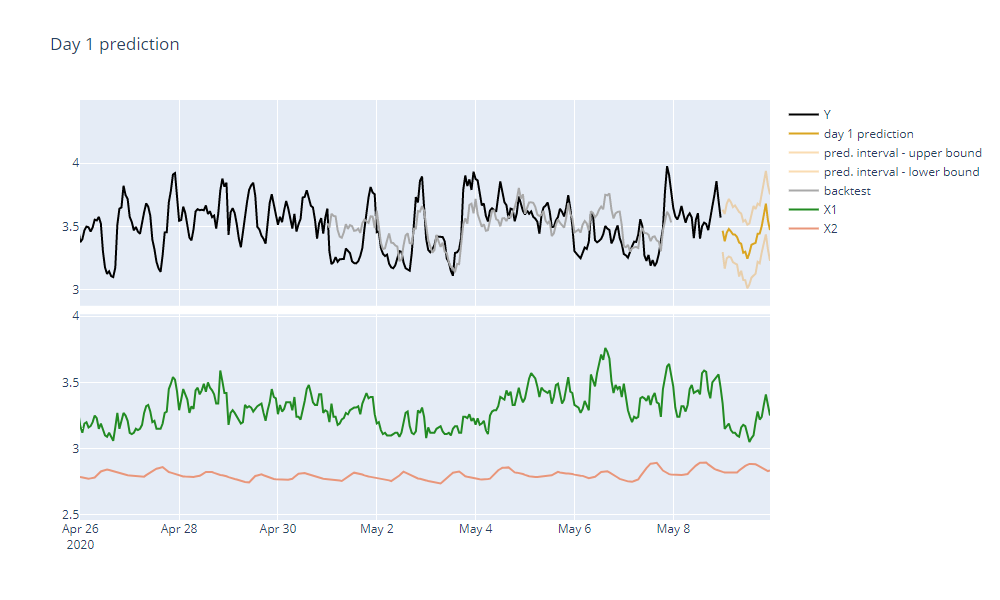
Day 1 of Forecasting
It is midnight of 2020-05-08. We can see that our dataset contains actual values of the target variable (second column) and predictors X1 and X2 (columns 3 and 4). We also have forecasts of predictors spanning through the whole following day.
When we run TIM, we get our 24 samples of forecasts. However, we also get a warning:
Predictor Y has a value missing for timestamp 2019-08-23T18:00:00.
Indeed, when we look at our dataset we will notice that there is a whole block of data missing for this date. This might be caused by something faulty in our data gathering process and we might want to resolve it beforehand to make the forecast more accurate. It also might be something that we are very well aware of and we can simply ignore this warning. TIM can deal with the missing data for us.
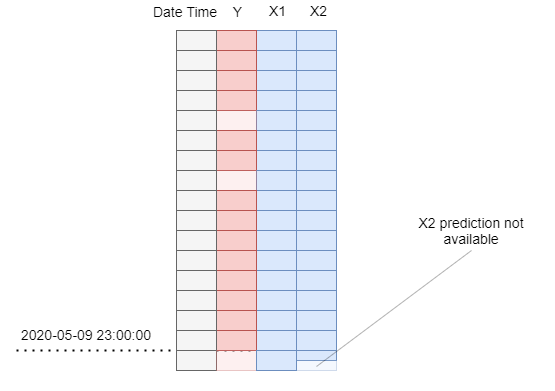
Day 2 of Forecasting
It is midnight of 2020-05-09. We can see that our dataset is updated with actual values of the target variable from the preceding day. Forecasts of predictors X1 and X2 have been replaced by their actual values. We also have forecast of the predictor X1 for the next day. However, our data provider failed to deliver a forecast of the predictor X2 for more than half of the next day! Fortunately this is not a problem for TIM at all, it will consume all the data available and take the incomplete availability into consideration. We will still get a good quality forecast for the next day.

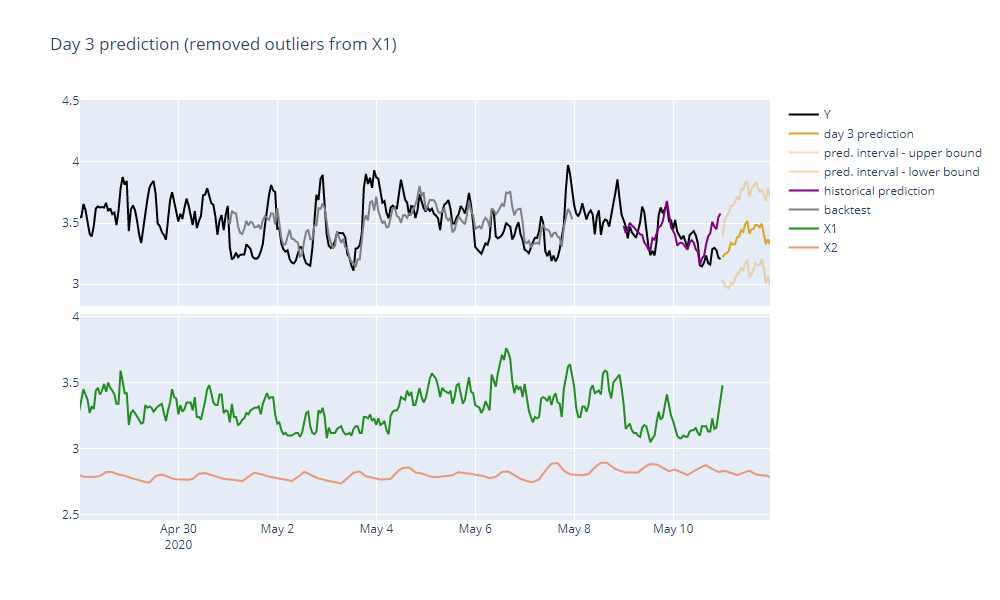
Day 3 of Forecasting
It is midnight of 2020-05-10. Our dataset is updated with known actual values and both forecasts of our predictors are available as well.
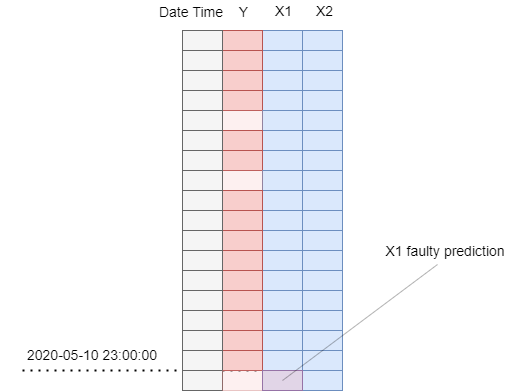
However after the forecast is done, we get a new warning:
Predictor X1 contains an outlier or a structural change in its most recent records.
And indeed, when we examine the X1 predictor, we can see that there is a huge dip in its values. This is most likely caused by a faulty data gathering process because nothing like it has happened with the X1 predictor before.
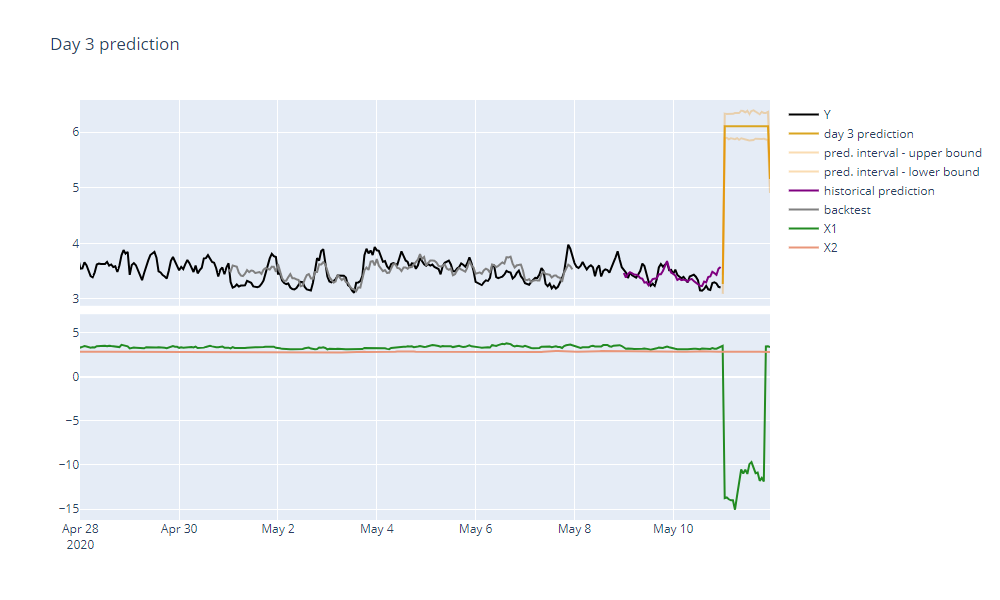
If we would keep it this way, our forecast accuracy would suffer greatly. To address this problem, we can either remove the whole predictor or its most recent faulty records. After choosing the latter, TIM runs without any additional warnings and the forecast we get looks in place once again.